


Last Updated: November 6, 2026
Quick Summary
Set your standing desk height by measuring from the floor to the underside of your elbow while it is bent to about 90 degrees, then raising the desk surface level with that figure. Your forearms should run parallel to the floor with wrists flat and shoulders relaxed. Cross-check with a calculator, but trust the elbow measurement.
- Measure in the shoes you actually work in, standing on a hard, level surface rather than carpet.
- A standing desk height calculator typically sets the surface at around 60% of total body height.
- Place the top third of the screen at eye level, about 50 to 70 cm from your eyes.
- Save your standing and seated heights as presets so you return to them with one touch.
- For shoulder ache, lower the desk by 1 to 2 cm and check the screen height.
Table of Contents
- Why Standing Desk Height Matters More Than You Think
- Step 1: Measure Your Standing Elbow Height
- Step 2: Set the Desk Surface to Your Standing Desk Elbow Position
- Step 3: Confirm Wrist, Forearm and Shoulder Alignment
- Step 4: Use a Standing Desk Height Calculator to Cross-Check
- Step 5: Set Your Standing Desk Monitor Height and Distance
- Step 6: Save Your Settings with Standing Desk Height Presets
- Step 7: Troubleshoot Discomfort and Alternate Sitting and Standing
- Frequently Asked Questions
Why Standing Desk Height Matters More Than You Think
Most people set their standing desk height once, guess at it, and never touch it again. Once the desk height stops pulling your shoulders and wrists out of line, check that the screen sits comfortably for your eyes as part of a complete ergonomic desk setup.
Getting the standing desk height right is the foundation for everything else: elbow angle, wrist position, monitor placement and how long you can comfortably stand before fatigue sets in.
Below are seven steps that take a standing desk from "roughly right" to properly fitted. Each one builds on the last, so work through them in order.
If you are still deciding which desk to buy, it helps to compare how different models handle height adjustment before committing. The best desks for remote workers round-up covers the key differences in range, controls and stability.
Step 1: Measure Your Standing Elbow Height
Standing desk height is the distance from the floor to the top of the desk surface, set so the elbows rest at roughly a right angle while typing. Measure this before touching any controls.
The measurement itself is simple:
- Stand upright in your normal working shoes.
- Let your arms hang relaxed at your sides.
- Bend one elbow to about 90 degrees, forearm parallel to the floor.
- Measure from the floor to the underside of that elbow.
- Note the figure in centimetres.
That number is your target desk surface height. It is the standing desk elbow position that everything else in this guide refers to.
Getting the Measurement Right (Shoes On, Floor Checked)
Small errors here cause real discomfort later. A common mistake is measuring in socks, then working in shoes with a 2 cm sole. That throws the whole setup out.
- Wear the footwear you actually work in.
- Stand on a hard, level surface, not carpet with underlay.
- Keep the shoulder relaxed, not lifted.
- Measure both arms and use the average if they differ.
Floor height matters too. If the desk sits on a rug over a hard floor, measure from the rug surface, not the boards underneath.
Step 2: Set the Desk Surface to Your Standing Desk Elbow Position
Raise or lower the desk until the surface sits level with the elbow measurement from Step 1.
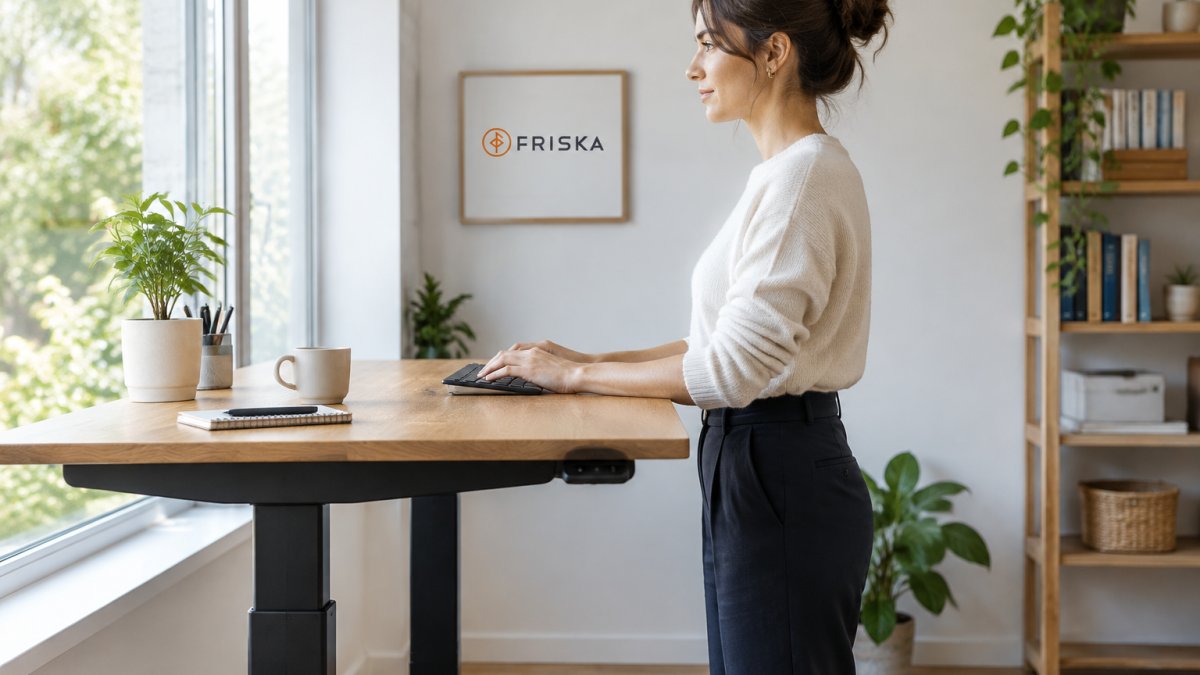
The elbows should sit at about a 90-degree angle. Forearms should run parallel to the floor, not sloping up or down.
Sit-stand desks with a digital readout make this easier. Note the number on the display once the surface is level with your elbows.
Watch out: setting the desk to elbow height while wearing thick-soled shoes, then switching to bare feet the next day, will leave you typing with raised shoulders.
Step 3: Confirm Wrist, Forearm and Shoulder Alignment
Neutral wrist position means the hand continues in a straight line from the forearm, with no upward or downward bend. Check this with your hands resting on the keyboard.
Work through these checks:
- Wrists: flat, not angled up or down.
- Forearms: parallel to the floor.
- Shoulders: relaxed and down, not shrugged towards the ears.
- Arms: close to the sides, not reaching forward.
A quick test: let your arms hang, then lift them to the keyboard without moving your shoulders. If the shoulders rise, the desk is too high.
Keyboard thickness counts here. A chunky mechanical keyboard raises the hands by a centimetre or more compared with a slim one. Set the desk height with the keyboard you actually use.
Step 4: Use a Standing Desk Height Calculator to Cross-Check
A standing desk height calculator gives a second opinion on your measurement. Most use a simple formula based on user height, typically setting the desk surface at around 60% of total body height. That is a useful sanity check, but it is not a fitting.
Here is how to use one properly:
- Enter your height in centimetres, not feet and inches.
- Compare the result with your elbow measurement from Step 1.
- If they differ by more than 3 cm, re-measure the elbow before adjusting anything.
- Trust the elbow measurement over the calculator.
Calculators are a starting point, not a final answer. Body proportions vary. Someone with a long torso and short legs will need a different height than a calculator predicts from total height alone. The same logic applies to sitting height.
Stockholm Signature Standing Desk (with Bluetooth Control) →
Measurement Method and Tolerances
The figure that matters is the distance from the floor to the top of the desk surface, measured at the point where your forearms rest. First, keyboard thickness: a chunky mechanical keyboard can raise your hands by a centimetre or more compared with a slim one, so measure with the keyboard you actually use in place. Second, footwear: a 2 cm sole changes the effective floor height, so pick one footwear routine and stick to it.
A small range often works better than a single exact number. Set the desk to the middle of that band, then use the upper and lower edges as your adjustment limits.
Watch out: if the calculator and your elbow measurement disagree by more than 3 cm, the usual cause is measuring in socks and then working in shoes, or measuring from a carpet rather than the hard floor beneath it. Re-measure before you trust either figure.
Step 5: Set Your Standing Desk Monitor Height and Distance
Standing desk monitor height should place the top third of the screen at eye level. The screen should sit roughly an arm's length away, around 50 to 70 cm.
Get this wrong and the neck pays for it, no matter how perfect the desk height is.
- Raise the monitor so your gaze lands on the upper part of the screen.
- Tilt the screen back slightly, around 10 to 20 degrees.
- Keep the monitor directly in front, not off to one side.
- Position it about 50 to 70 cm from your eyes.
Laptop users face a harder problem, because the screen and keyboard are joined. A standing desk monitor arm lets the screen move independently of the desk surface, which makes fine-tuning the height and distance far easier.
Step 6: Save Your Settings with Standing Desk Height Presets
Standing desk height presets store your measured positions so you can return to them with one touch. Use them, or you will drift back to guessed settings within a week.
Program at least two positions:
- Your standing typing height from Step 2.
- Your seated height, set with the chair adjusted.
Then add a third if you use a treadmill base or anti-fatigue mat, since both change the effective floor level.
The Stockholm Signature standing desk stores saved heights through both physical controls and Bluetooth, so the exact typing position is one button away. Its height range runs from 595 mm up to 1.3 m.

Step 7: Troubleshoot Discomfort and Alternate Sitting and Standing
Discomfort while typing usually points to one of four causes. Work through them in order, changing one thing at a time so you can tell what fixed it.
- Shoulder ache: desk too high, or monitor too low. Lower the desk by 1 to 2 cm and check that the top third of the screen sits at eye level.
- Wrist strain: keyboard angled, or desk surface too high. Flatten the keyboard feet and drop the desk until the forearms run parallel to the floor.
- Lower back ache: standing too long without a break, or feet on a hard floor. Shorten your standing spells and add an anti-fatigue mat.
- Neck stiffness: screen below eye level. Raise the monitor or tilt it back slightly, around 10 to 20 degrees.
A common pattern is that one adjustment fixes two symptoms at once. Raising the monitor, for example, often removes both neck stiffness and the tendency to lean forward, which in turn eases lower back ache. Change one variable, wait a day, then reassess.
Alternating Between Sitting and Standing
Alternating between sitting and standing matters as much as the height itself.
Set and verify both positions rather than treating standing as a posture to maintain continuously. Program your standing typing height and your seated height as separate presets, then check each one with the same elbow and wrist tests from Steps 2 and 3. An anti-fatigue mat helps with foot and lower back comfort during longer standing spells. So does a stool for perching during lighter tasks.
Laptop-Only and Multi-Monitor Setups
Laptop-only workers need a stand to raise the screen to eye level, plus an external keyboard at desk height. An ergonomic laptop stand solves the screen height problem while keeping the keyboard within reach.
Multi-monitor setups need the primary screen centred at eye level, with secondary screens angled inward. Keep all screens at a similar distance so the eyes do not refocus constantly when switching between them.
Watch out: if discomfort persists after two rounds of adjustment, the cause may be arm length or mobility rather than desk height. In that case, prioritise a neutral wrist and relaxed shoulder over hitting an exact elbow angle, and consider a keyboard tray or an adjustable chair armrest to bridge the gap.
If typing still feels wrong, match the symptom to its likely cause and fix before adjusting anything else.
| Problem | Cause | Fix |
|---|---|---|
| Shoulder ache | Desk too high, or monitor too low | Lower desk by 1 to 2 cm; check screen top third at eye level |
| Wrist strain | Keyboard angled, or desk surface too high | Flatten keyboard feet; drop desk until forearms are parallel |
| Lower back ache | Standing too long without a break, or hard floor | Shorten standing spells; add an anti-fatigue mat |
| Neck stiffness | Screen below eye level | Raise monitor or tilt it back around 10 to 20 degrees |
Frequently Asked Questions
How high should a standing desk be for typing?
Set the desk surface level with your standing elbow height, so your elbows sit at roughly a 90-degree angle with forearms parallel to the floor. For most people that is around 950mm to 1100mm, but your own measurement decides it, not an average. Measure from the floor to the crease of your elbow while standing in the shoes you normally wear, then set the desk to that figure and check that your wrists stay flat and your shoulders stay relaxed.
Where should your elbows be when typing at a standing desk?
Your standing desk elbow position should be close to your sides, bent at about 90 degrees, with forearms resting level on the desk surface. If your elbows sit below the desk you will reach up and tense your shoulders; if they sit above it you will drop your wrists to compensate. Adjust the height in small increments until your upper arms hang naturally and your hands rest on the keyboard without lifting or reaching.
How do you save a standing desk height as a preset?
The Stockholm Signature, with its physical and Bluetooth controls, lets you program standing desk height presets. Raise the desk to your typing height, then hold the memory button for a few seconds until the control panel confirms the save. Set a second preset for seated height so you can switch between the two with one touch. Check the display matches your measured figure, and if the desk drifts over time, reprogram the preset rather than adjusting by eye.
What should you do if your standing desk does not adjust low enough?
Check the desk's minimum height against your seated elbow height first. The Stockholm Signature lowers to 595mm, which suits shorter users and many wheelchair users, while the Mora stops at 725mm. If your desk bottoms out above your ideal seated height, a footrest or a height-adjustable keyboard tray can bridge the gap. For standing work, add a standing mat to fine-tune the last few centimetres without changing the desk setting.
